
By Sanjay Soni

When it comes to training with your handgun, you really have two options available to build your skills – Dry Fire Drills and Live Fire Drills. Before we go further, I would like to reiterate the aspect of Safety!
Safety First: Four Rules of Firearm Safety
Whether you’re at home or at a gun range, safety should always be your number one priority. Whenever your gun isn’t in use, keep it unloaded and safely stored away in a protective gun case or a gun safe.
Always follow the Four Rules
- Keep your gun pointed in a safe direction
- Always treat your gun as if it were loaded
- Keep your finger off the trigger until you’re ready to shoot
- Be sure of your target and what lies beyond it
Dry Fire Drills and Live Fire Drills
Both are valuable, and both will allow you to build your handgun proficiency and attain the accuracy you are striving for.
Dry Fire Drills
Dry Practice Makes Perfect!
Although live drills are important, dry fire drills are the single best thing you can do to improve your handgun accuracy. Dry fire drills can be done anywhere at any time and cost nothing. If you keep up with your dry fire practice, you should start to see improvement in your accuracy with each visit to the gun range.
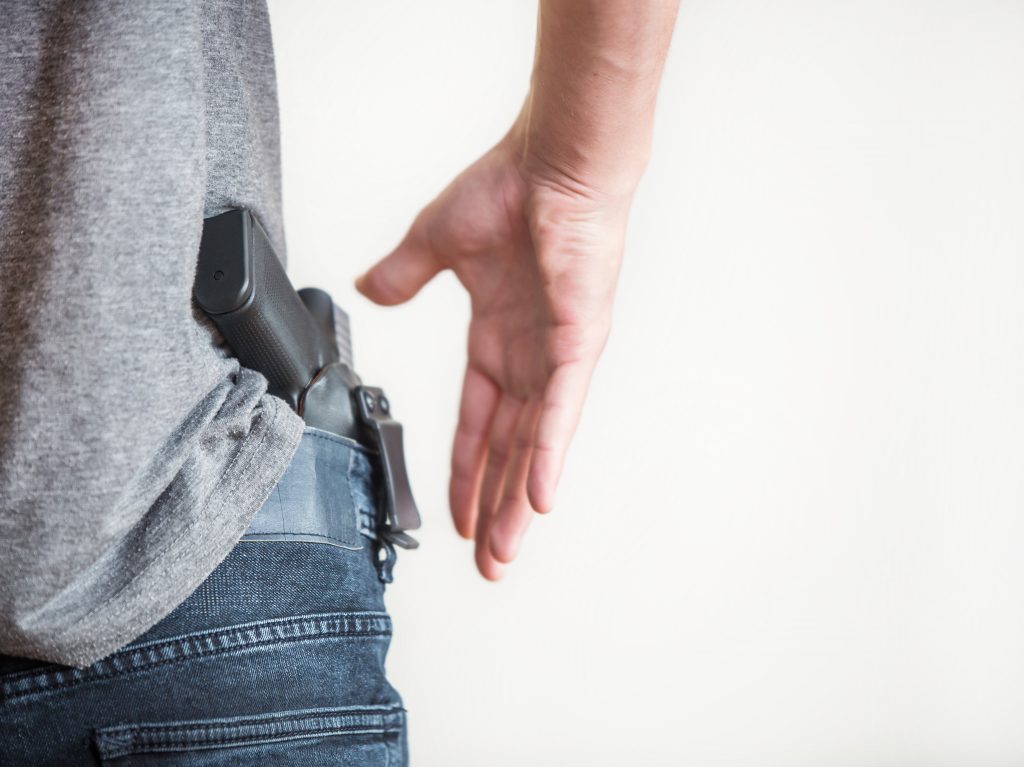
Dry fire exercises are those that are done with your handgun with no ammunition. You can practice your draw stroke, sight alignment and trigger squeeze all without firing a shot. The benefit to dry fire practice is that you don’t have to go to the range. You can practice in your garage, basement, or office.
Why Dry Firing?
The main point of dry fire practice is to develop muscle memory so you consistently produce an awesome trigger pull and don’t flinch when it’s time for real shooting.
And if you’ve developed some bad habits along the way, it does a great job of rewiring you back over time.
At least for me, I find that after a week or two of dry firing a few minutes a day, I become “one” with my trigger and grip.
Becoming “one” with Trigger and Grip
My grip just feels right, and I can sense all the little nuances in the trigger pull. And when I focus on the front sight and pull the trigger, the front sight stays super steady.
It takes a lot of practice to reach that point. Remember, it’s a diminishing skill that needs to be kept up to date too. Even after just a few days of not practicing, I can feel some differences the next time I dry fire or shoot.
Keep in mind that you are still handling a gun and as such, you should always treat that gun as if it were loaded. For all dry fire exercises, unload your handgun and all the magazines you will be using for your training session. Then, remove all the live ammo from the room you are training in.
As a final reminder that your dry fire practice session is beginning, say to yourself, out loud, “dry fire practice beginning, gun is unloaded.” When you finish your session and reload your magazines and your gun, again, say to yourself out loud, “dry fire practice is over, gun is loaded and hot.” This is just an extra level of precaution that reminds you that the gun is no longer safe for dry fire exercises.
Live Fire Drills
Live fire exercises are those done with real ammo, on the range, sending rounds to the chosen target. Now you get a chance to see how your dry fire practice is paying off.
The real goal is to manipulate the handgun with live fire in the exact same manner as you did in your dry fire practice. Your draw, presentation, and trigger squeeze should all be the same. Except now you have all that commotion at the end of your arms; muzzle blast, recoil, ejecting brass, etc.
If you are executing all the fundamentals correctly, you should see improvement in your accuracy on every trip to the range.
Five Rules to Remember
We’ve taken a look at the challenge of mastering our handgun, as well as handgun shooting fundamentals and the types of training we can do to begin building solid accuracy into our shooting. Before we dive into the specific drills to improve your accuracy, let’s review the basic safety rules. These rules are necessary if you want to be effective in your training.
Before we start the Drills I would like to again remind you of the basics of handgun shooting which need to be in place for an accurate shot.
1. Keep Your Grip High and Tight
How you hold the handgun is key to controlling recoil and can even slightly make up for a sloppy trigger pull. Unfortunately, the grip is also one of the things that shooters tend to get wrong.
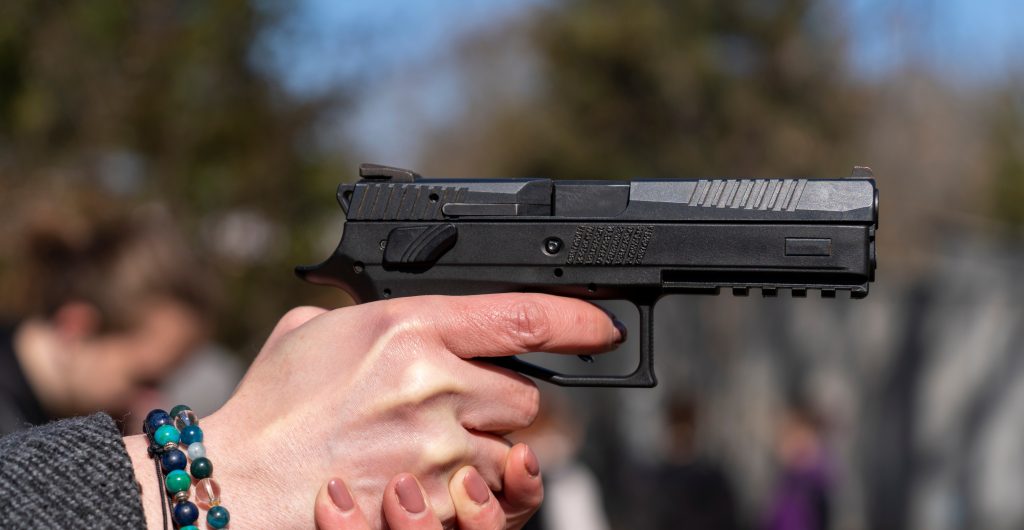
When holding a handgun, your grip should be high and tight, meaning there should be no spaces between your flesh and the gun when you grip it. Having spaces in between your hand and the gun means that there is room for the gun to move when it recoils. The web of your hand should go as high as possible without interfering with the slide, and your non-dominant hand should come forward to fill the empty space on the grip panel.
2. Get Your Stance Right
Fast and accurate handgun shooting demands a stable shooting stance. A proper handgun shooting stance will set you up for success in other areas, such as sight alignment, trigger control, and recoil management.
The most popular handgun stances include the Isosceles, the Weaver, and the Chapman. There is no “best” stance. All three have their advantages and disadvantages. Experiment with different stances and choose one that you feel most comfortable with.
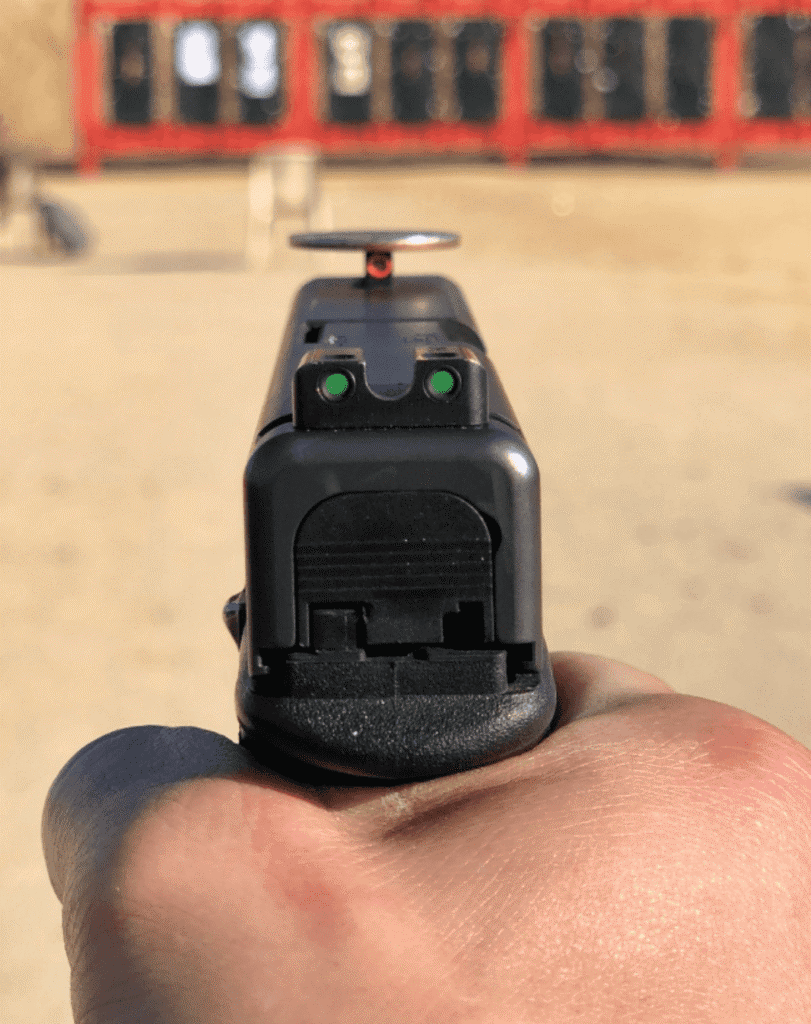
3. Use the Front Sight
One of the biggest mistakes that beginner shooters tend to make is looking directly at their target as opposed to their front sight. If you’re shooting for pure accuracy, you need to line up the front and rear sights. The front sight should be in clear focus, while the rear sights are somewhat fuzzy.
Don’t pull the trigger until you see that your sights are aligned. Doing otherwise will only instill bad shooting habits that will be hard to break.
4. Work on Recoil Anticipation
Recoil anticipation screws up a lot of hand gunners. This is one of the reasons why dry firing—shooting without live ammo—is so important because it helps build muscle memory that can help you overcome recoil anticipation. If you find yourself flinching in anticipation of the recoil, try to pull the trigger as if you were just dry firing it and let the gun do its thing.
Dry firing is perfectly safe for the most part (the exception being rimfire guns) and can significantly improve your handgun accuracy. Keep in mind that the four rules of gun safety still apply to dry firing. So when you’re finished dry firing your pistol, be sure to immediately return it to the pistol case. People have dry firing accidents when they get distracted, load their firearm and return to “dry firing,” only to experience a loud bang. A handgun case can help prevent unnecessary accidents.
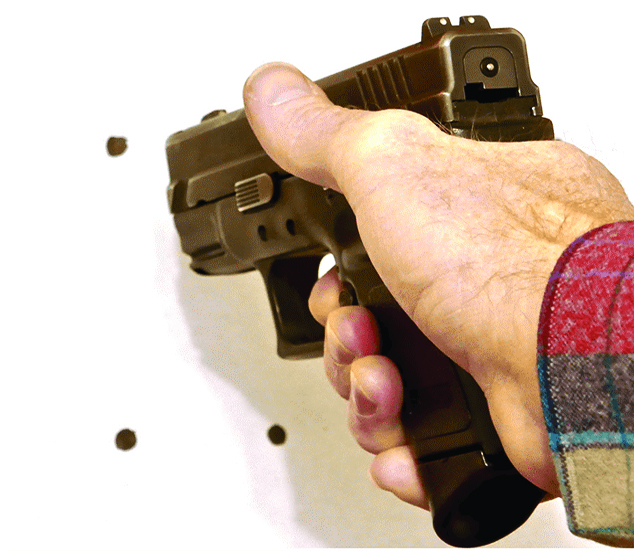
5. Learn Proper Trigger Squeeze/Press
Despite trigger pull being one of the most important aspects of handgun shooting, it’s often easily neglected by beginners and experienced shooters alike. If you have your sights lined up and your shot is still veering off the left or the right, an improper trigger pull is probably to blame.
Most handgun instructors advise using the center of the pad on your fingertip and the first knuckle joint to press the trigger. However, this may differ for everyone based on your hand and finger size.
Let us now look at the various Live Drills that will help you in becoming a better shot!
Drill 1: Dot Slack Torture Drill
As mentioned earlier, trigger control is the key to accurate handgun shooting and this exercise serves to examine your trigger squeeze.
Take a piece of paper and draw 10 dots with a Sharpie about the size of a pencil eraser. Now, tape your paper to the wall or on a target stand. Stand so that when you press your gun out toward the target, your muzzle is about one inch from the target.
Begin Drill 1
As with all dry-fire exercises, be sure your firearm is unloaded. Remove all live ammo from your training area and be sure you have a safe backstop.
Cycle your action so the gun is cocked and ready to fire.
Press the gun out one-handed with your strong arm and align your sights with one of the dots on your target.
Now, begin to work the take-up (or slack) out of your trigger and bring it right to the point before it fires. This drill is taught at the Sig Academy and, according to Mike Green, about 70% of our shooting habits reside in the trigger slack. This means that if the front sight is moving AT ALL during the slack take-up, we are building in micro movements that cause us to manipulate the trigger from an inaccurate front sight position.
Look for any movement in the front sight as you take up the slack.
Work through all 10 dots from the same placement of your feet and shoulders. This forces you to angle your handgun in different positions.
End Drill 1
With bigger dots, you can do this same drill as a live fire exercise. Use a bigger piece of paper or the back of a target, place the target 3 yards away and concentrate on minimal sight movement as you take up the slack and press through to send the shot.
Drill 2: Dot Reset Torture Drill
As in the previous drill, we will use the same page with ten dots on it. However, now we will press through the slack and “fire” our shot.
Begin Drill 2
With the trigger pinned back against the frame, rack the slide to the rear to cock the firearm.
Now, extend your gun out, line up the sights on a dot and slowly release the trigger. But only release the trigger as far as the reset. You should be able to hear and feel the trigger reset for the next shot.
End Drill 2
This exercise allows you to see what’s happening after the shot and as you work the trigger in reverse. Any front sight movement in this portion of our shooting sequence means we will be slower getting back on target and making follow up shots.
When we master trigger take up and reset, then we allow ourselves to start from true accuracy, instead of having to make up for it as we manipulate the trigger.
Drill 3: Balance the Brass (or Coin)
To continue honing our trigger squeeze, we can move to another dry-fire exercise that will reveal our ability to squeeze and reset smoothly and without movement.
Begin Drill 3
With your gun unloaded and a safe backstop, rack your slide to cock the gun, then build your grip and press out to the target. Once the gun is fully extended and you have the sights aligned on your target, have your shooting partner balance an empty cartridge case or coin on your front sight.
Now, begin your trigger squeeze all the way through ‘firing’ the shot. Were you able to properly squeeze off the shot without the case or coin falling off?
End Drill 3
You can also reverse this process and rack your slide while the trigger is pinned to the rear and then practice your trigger release to reset while keeping the case balanced on the front sight.
Drill 4: One Ragged Hole
As the name suggests, the goal of this live-fire drill is to have every shot go through one hole. Caylen Wojcik, the owner of Kalinski Consulting and Training, has his students begin at three yards with a one-inch dot to aim at.
Begin Drill 4
- Prep your gun
- Draw from your holster
- Press out to the target
- Align your sights
- Slowly squeeze the trigger and send your shot. Try to fire your shot within 10 seconds of getting the gun on target.
- Reholster, and repeat until your magazine is empty.
End Drill 4
You can then shoot from five yards with a two-inch dot, then seven yards with a three-inch dot.
This is a slow, deliberate drill designed to make you concentrate on aiming at the exact same spot, every time and executing a perfect trigger squeeze, sending every shot through the same hole.
Drill 5: The Loved One
This drill can be followed after the One Ragged Hole drill. Here we use two full-size silhouette targets. However, we’re going to fasten one of the targets partially over the other target to simulate an assailant holding a loved one hostage.
Start off with a good portion of the assailant target exposed to the side of your loved one. Take a marker and write the name of your loved one on the front target to induce some stress into the situation.

Begin Drill 5
- Start at the three-yard line with the gun at low-ready or in the holster.
- Set your timer for five seconds.
- At the start buzzer fire two rounds into the assailant target.
End Drill 5
As your scores begin to increase you can reduce the size of the assailant target that is visible, increase the range or reduce the time interval or all three.
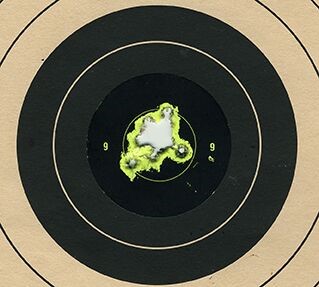
I also found this graphic to be immensely helpful in diagnosing my shooting errors.
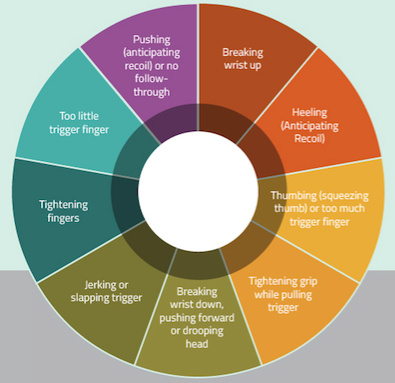
Have a target, shoot a couple shots at it, and see where they land in relation to the chart.
I usually start off pretty strong and as I get more comfortable I forget some of my lessons, such as remembering to squeeze. That’s when I start telling myself to “squeeze” every shot again.
It’s one thing to be dry firing and shoot perfectly, but another once real recoil is entered into the equation.
We shall continue the drills in the next article.
Sanjay Soni is the Managing Director of Hughes Precision Manufacturing Pvt. Ltd. India’s first small caliber manufacturer in the private sector